



Custom Forms Overview
The Custom Forms module lets you:
- Build forms using drag-and-drop field types
- Publish forms publicly with shareable links and QR code
- Map submitted data into Lead, Student, or Class Enrollment workflows
- Track and manage submissions from the Responses section
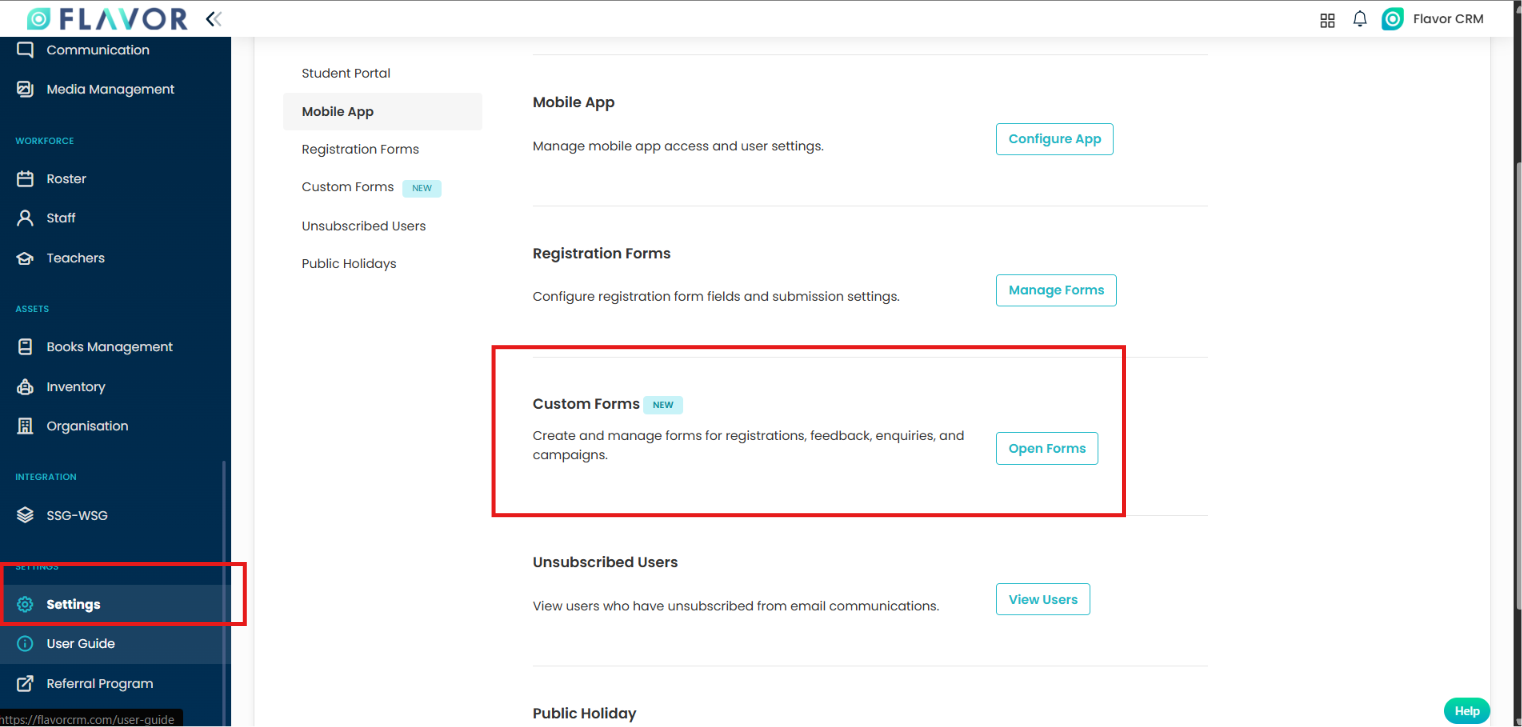
Step 1: Access Custom Forms
- From Dashboard, go to Settings
- Open Custom Forms
- You will land on the Custom Forms List page
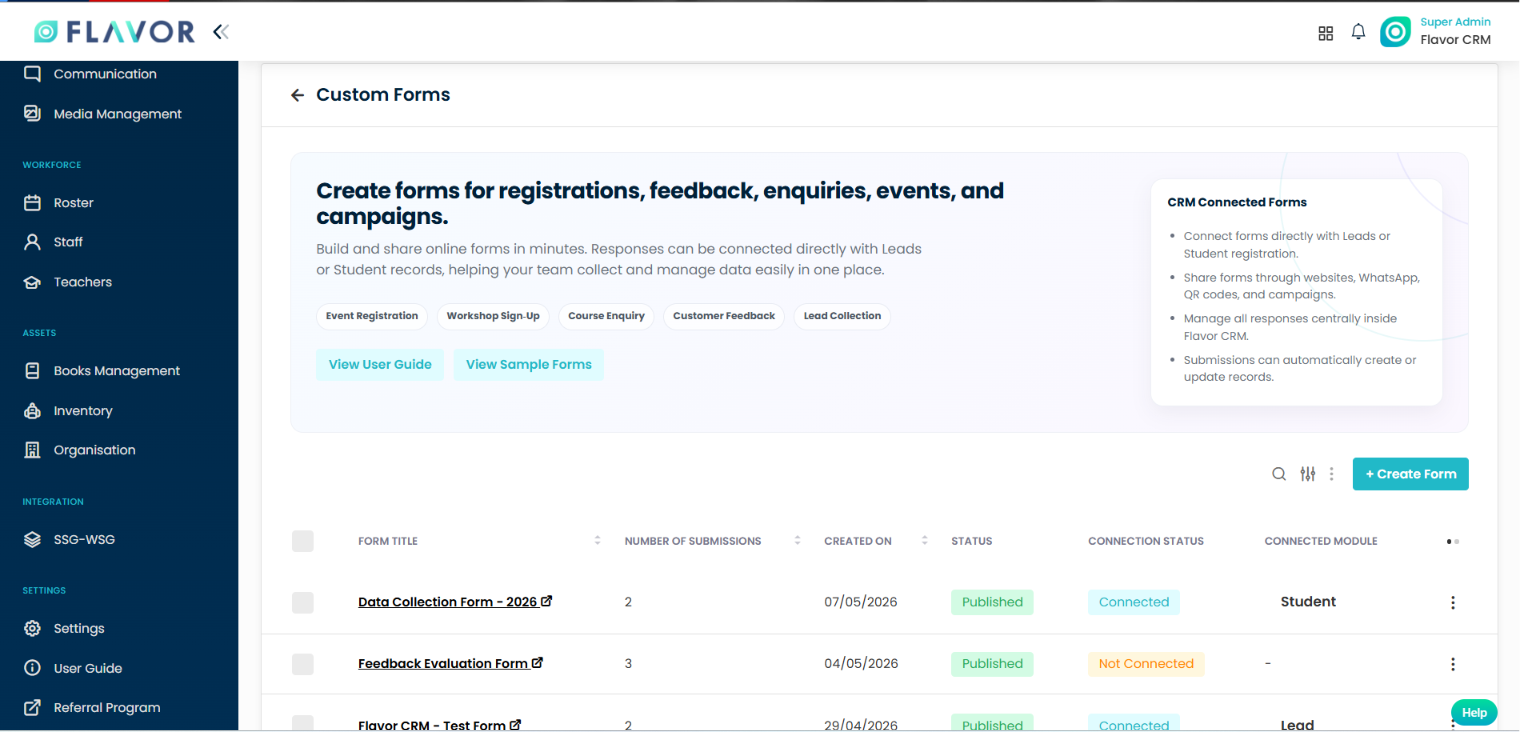
Create a Custom Form
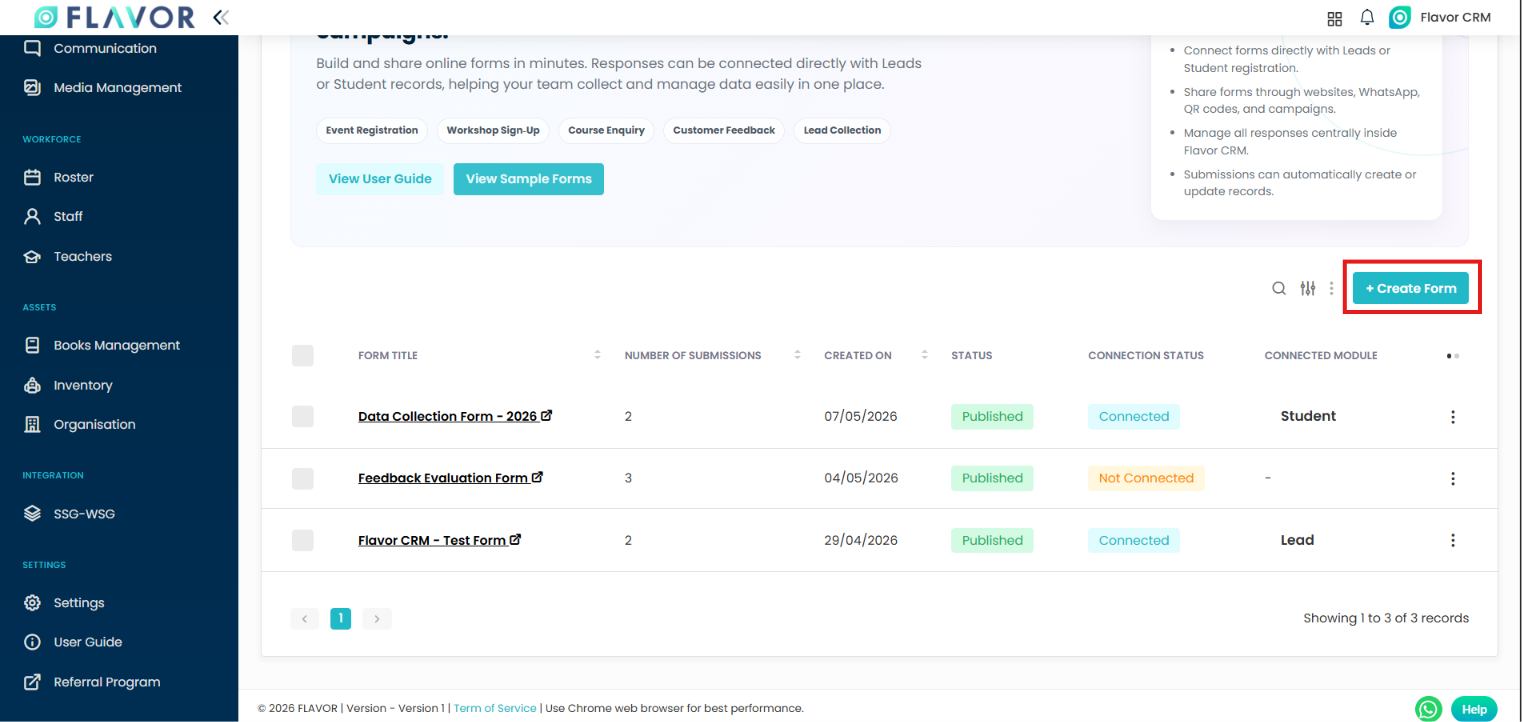
Step 1: Open Create Form
- Click “+ Create Form” from Custom Forms list
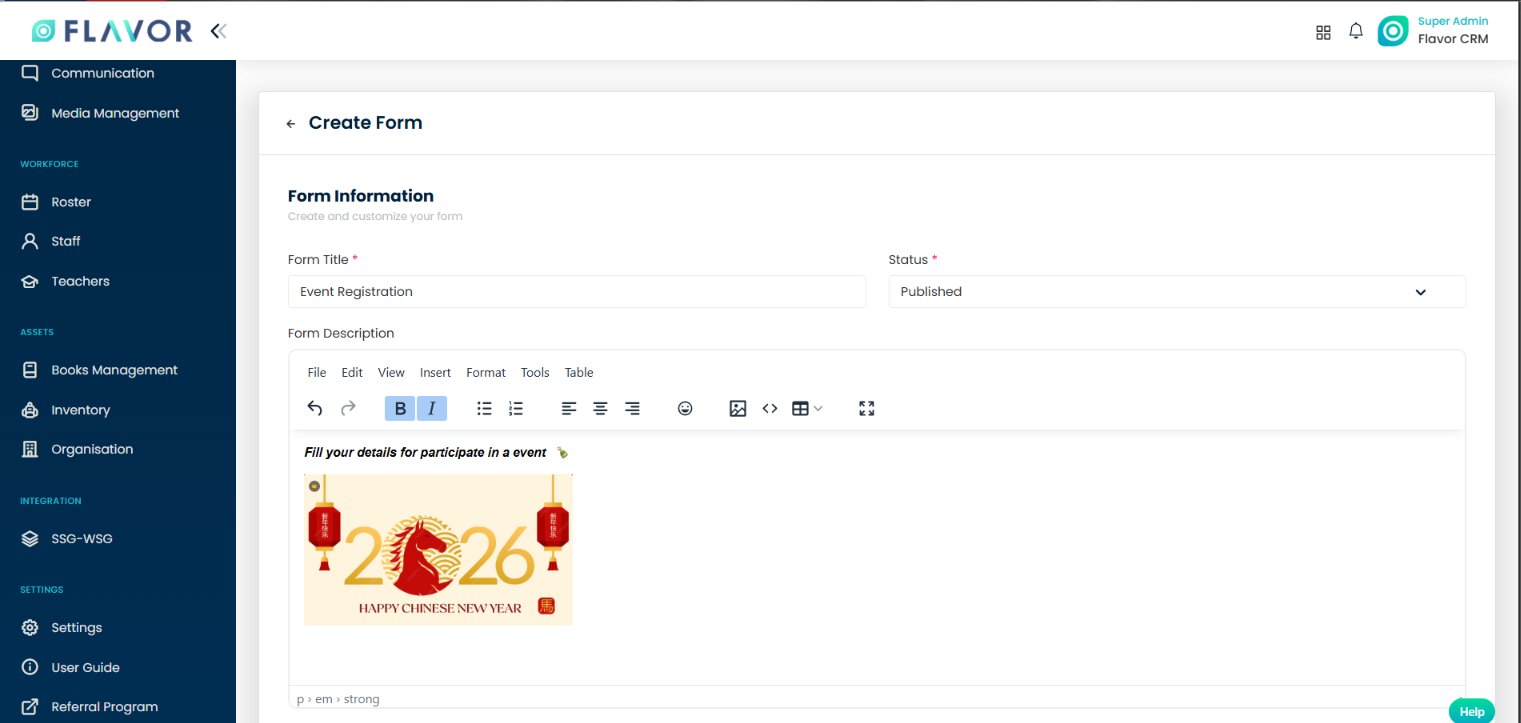
Step 2: Fill Form Information
- Enter Form Title (must be unique)
- Select Status:
- Draft: Not publicly active
- Published: Live and accessible
- Archived: Not active for collection
- Add Form Description (optional)
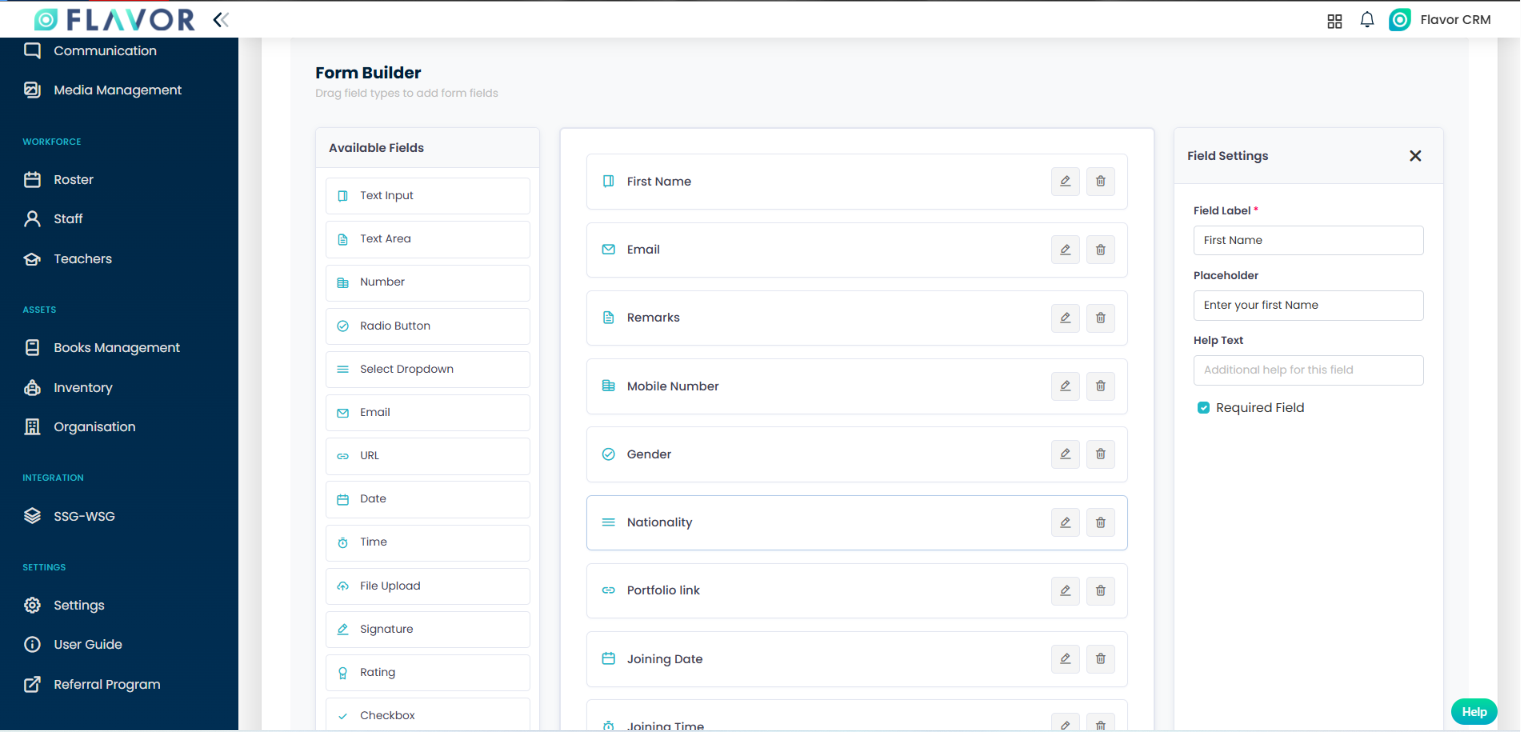
Step 3: Build Fields
- Drag field types from left panel to canvas
- Configure each field in Field Settings
- Supported fields include:
- Text Input, Text Area, Number
- Radio, Select Dropdown, Checkbox
- Email, URL, Date, Time
- File Upload, Signature, Rating
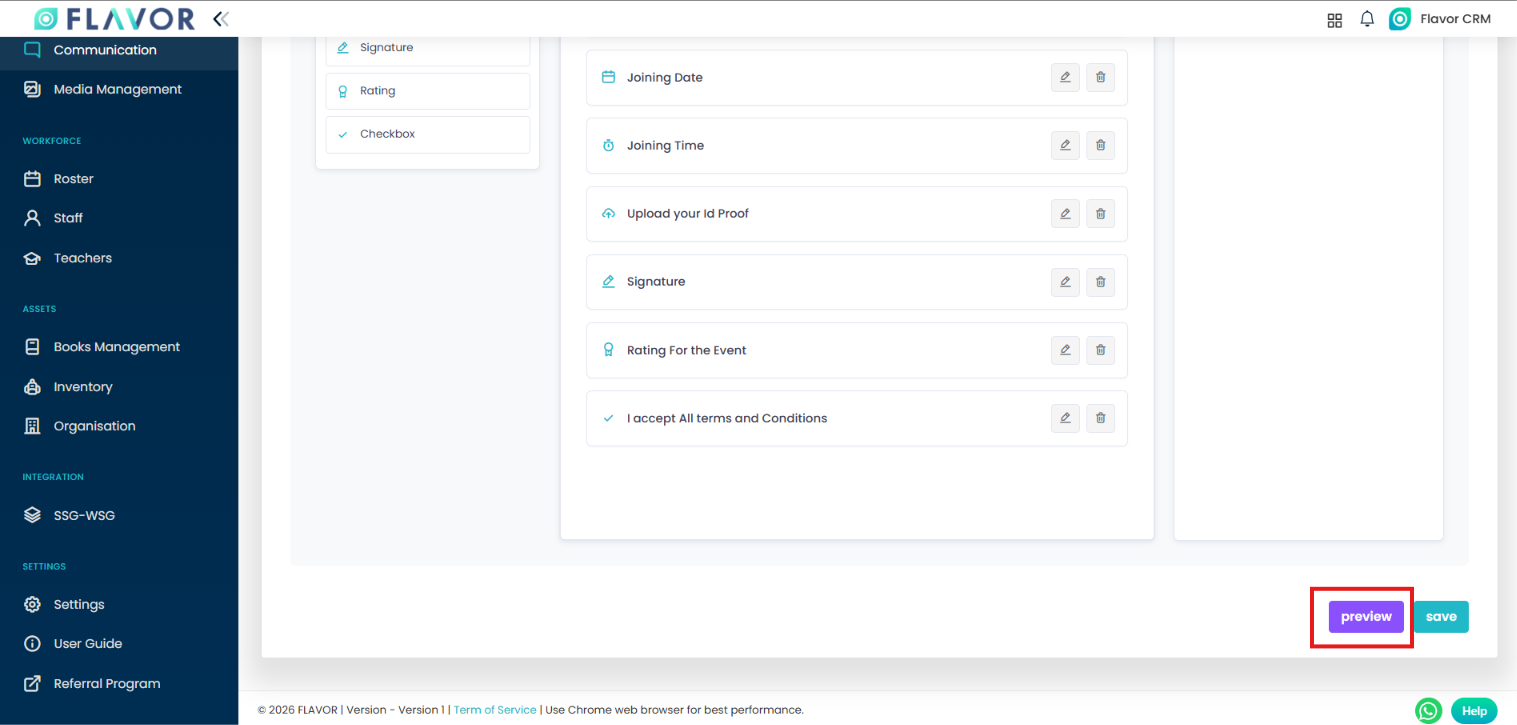
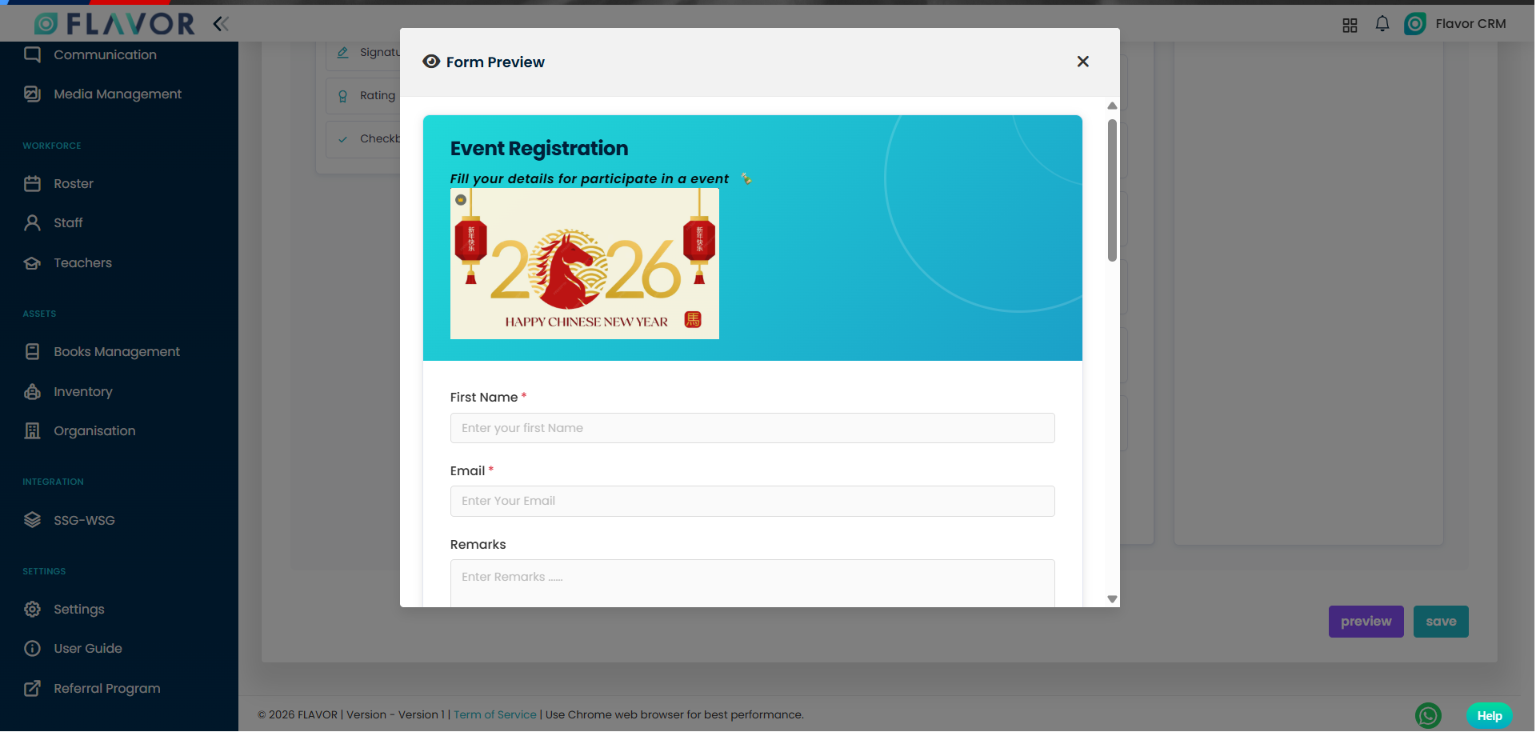
Step 4: Preview and Save
- Click Preview to check layout
- Click Save
Edit a Custom Form
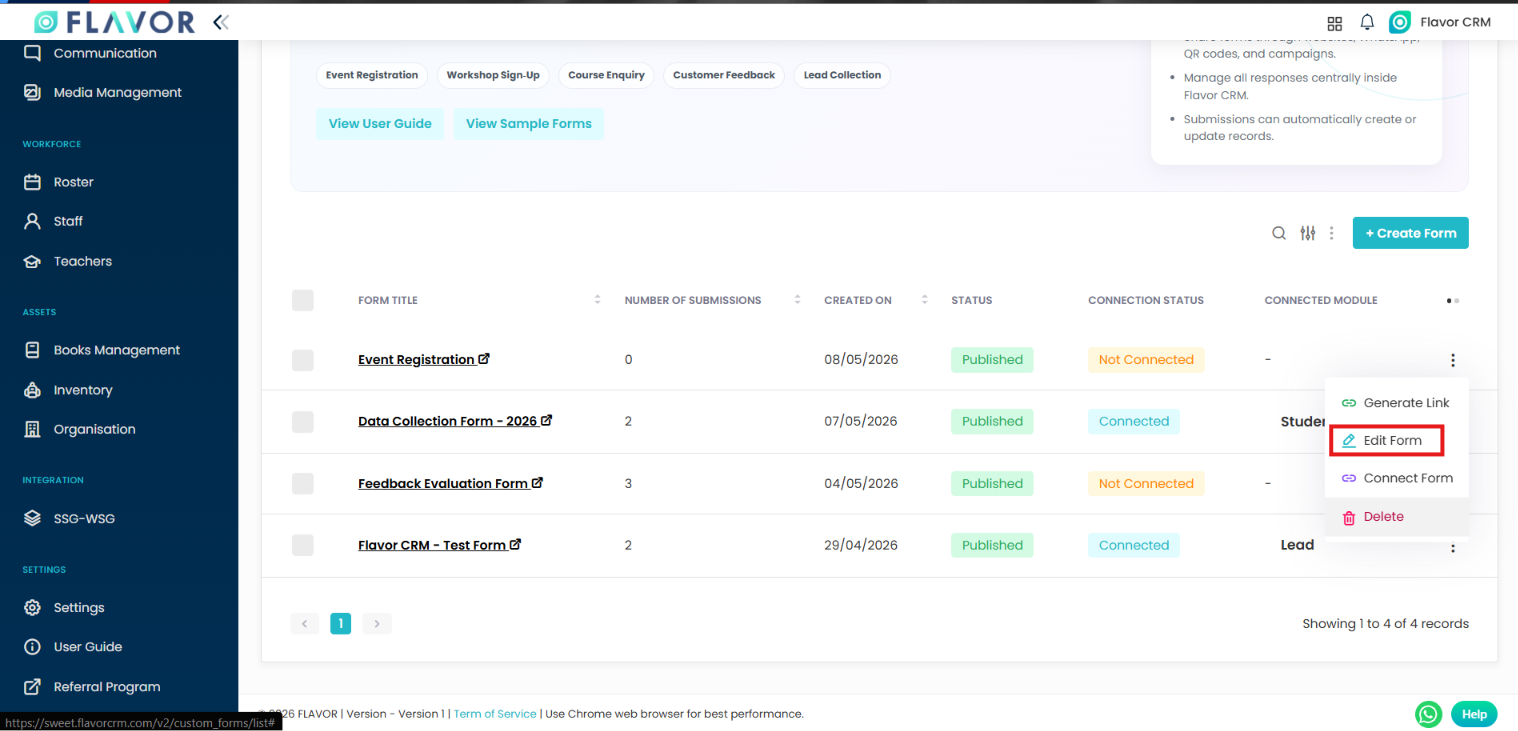
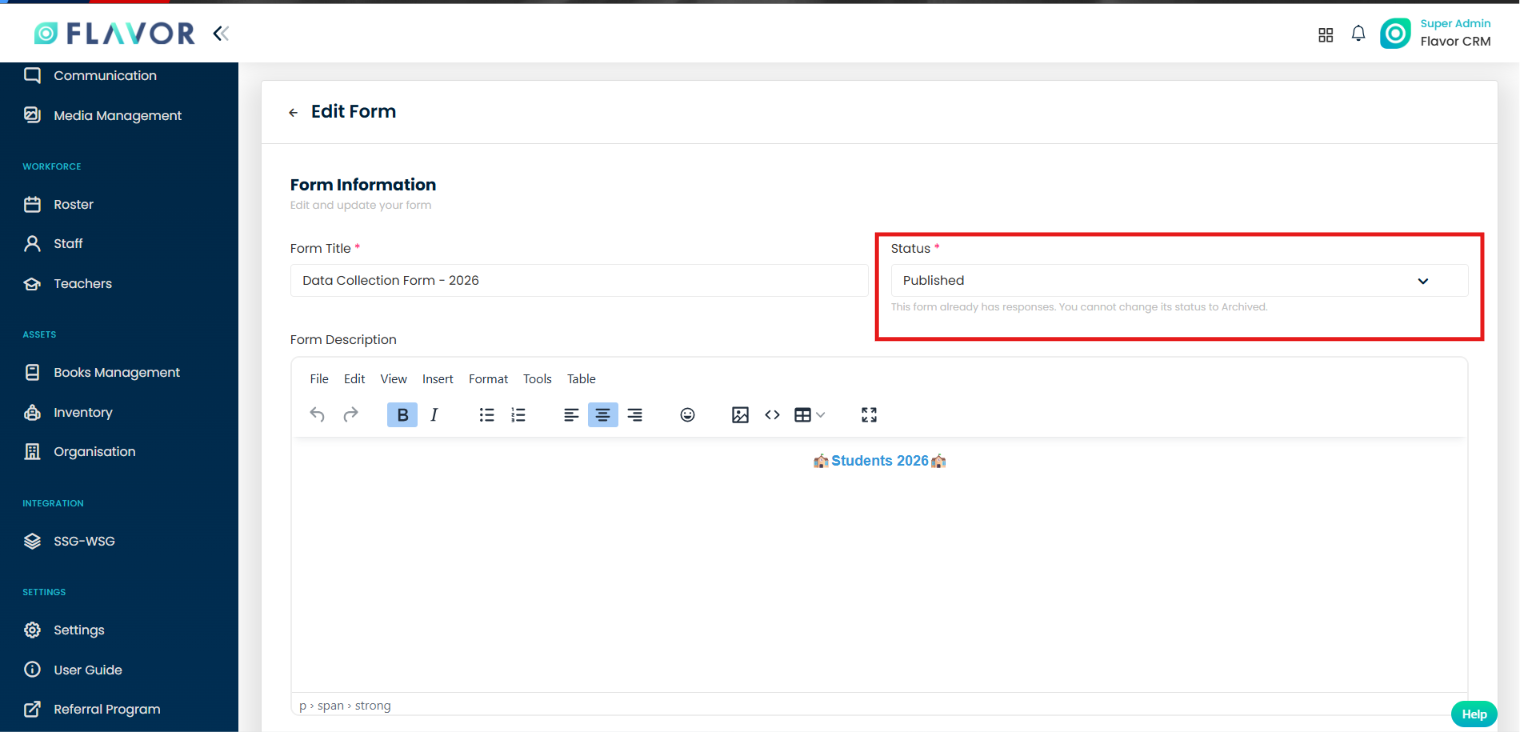
- Open form from list and click Edit
- Update title, status, description, and field settings
- Click Save
Note:
- If the form already has responses, changing status to Archived is restricted
Generate and Share Form Link
Step 1: Generate Link
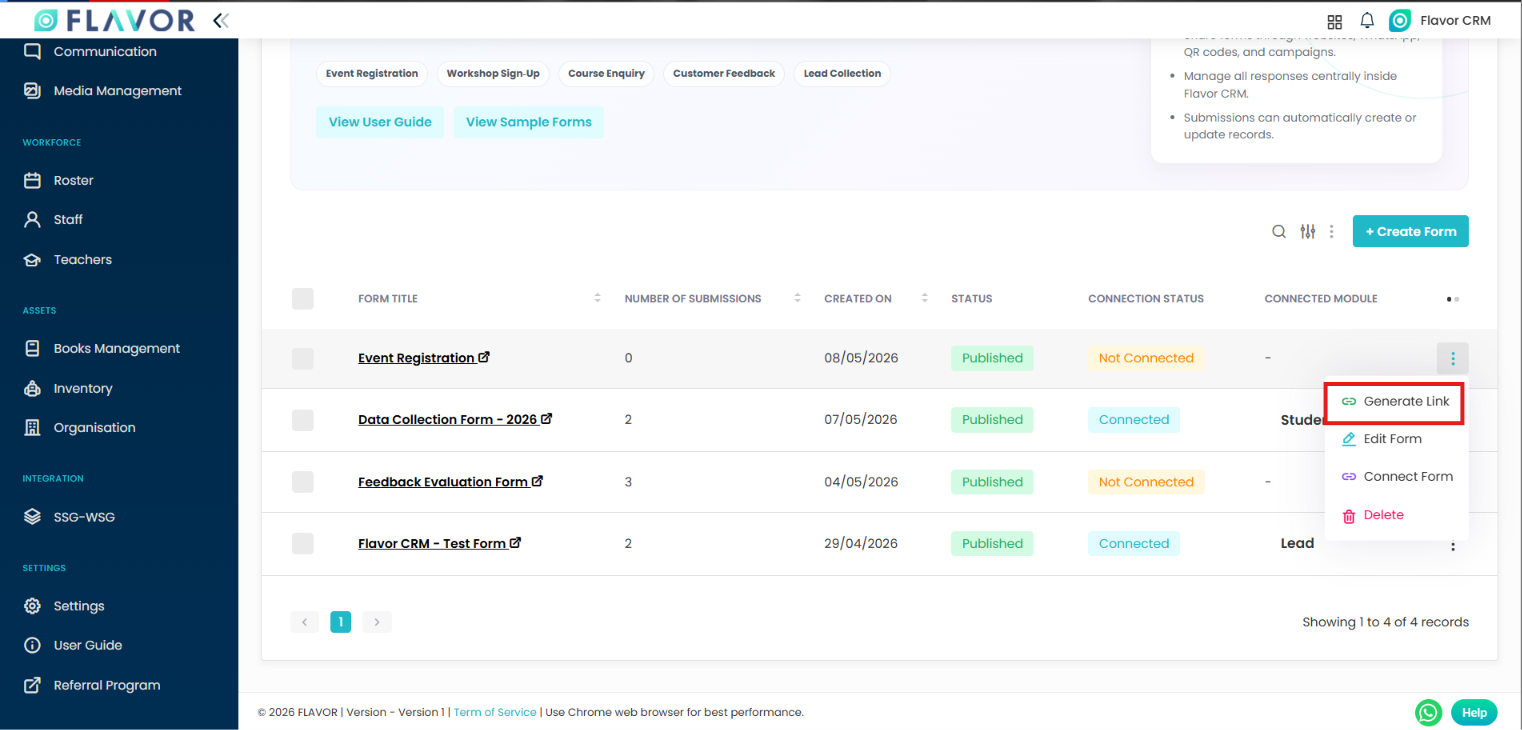
- From form actions, click Generate Link
Step 2: Share
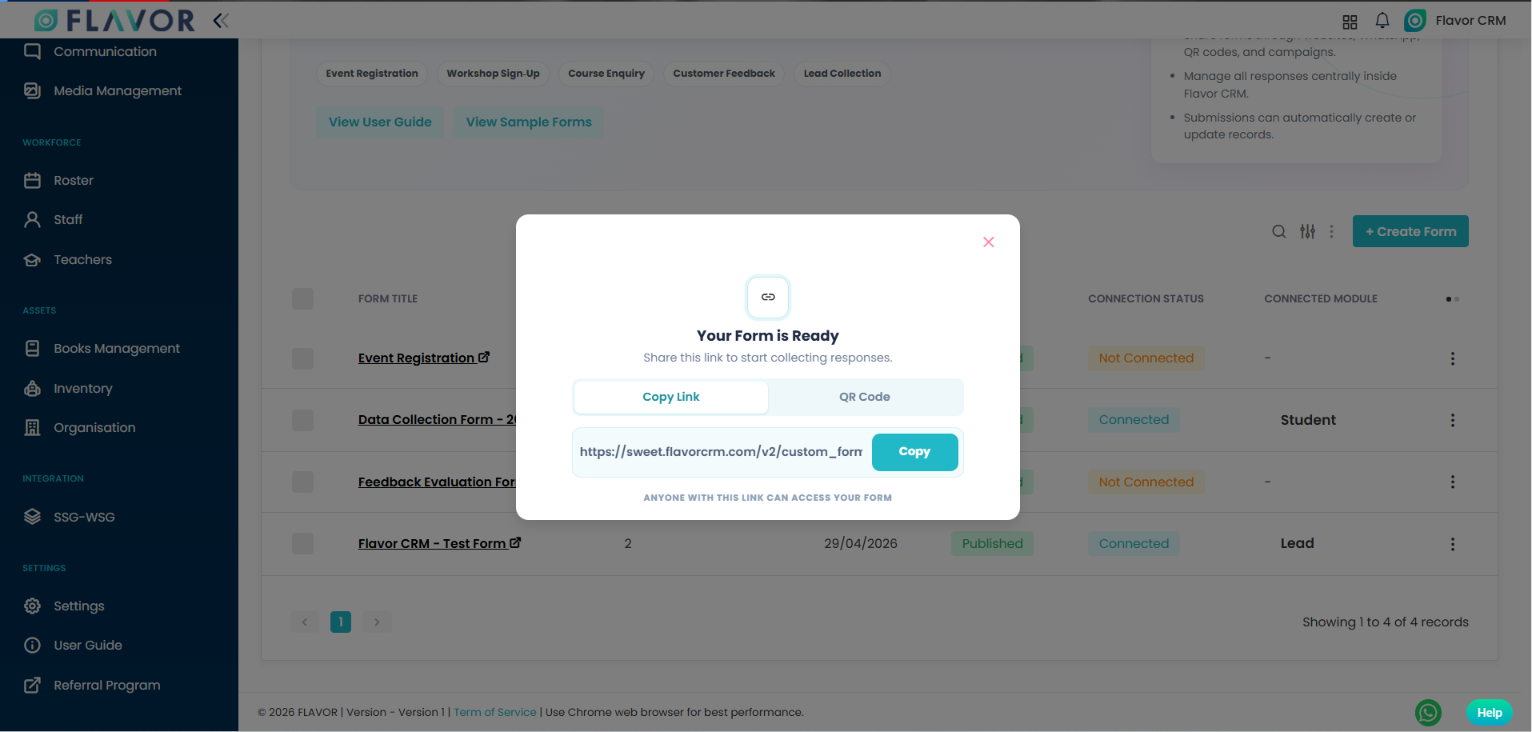
- Use Copy Link tab to copy URL
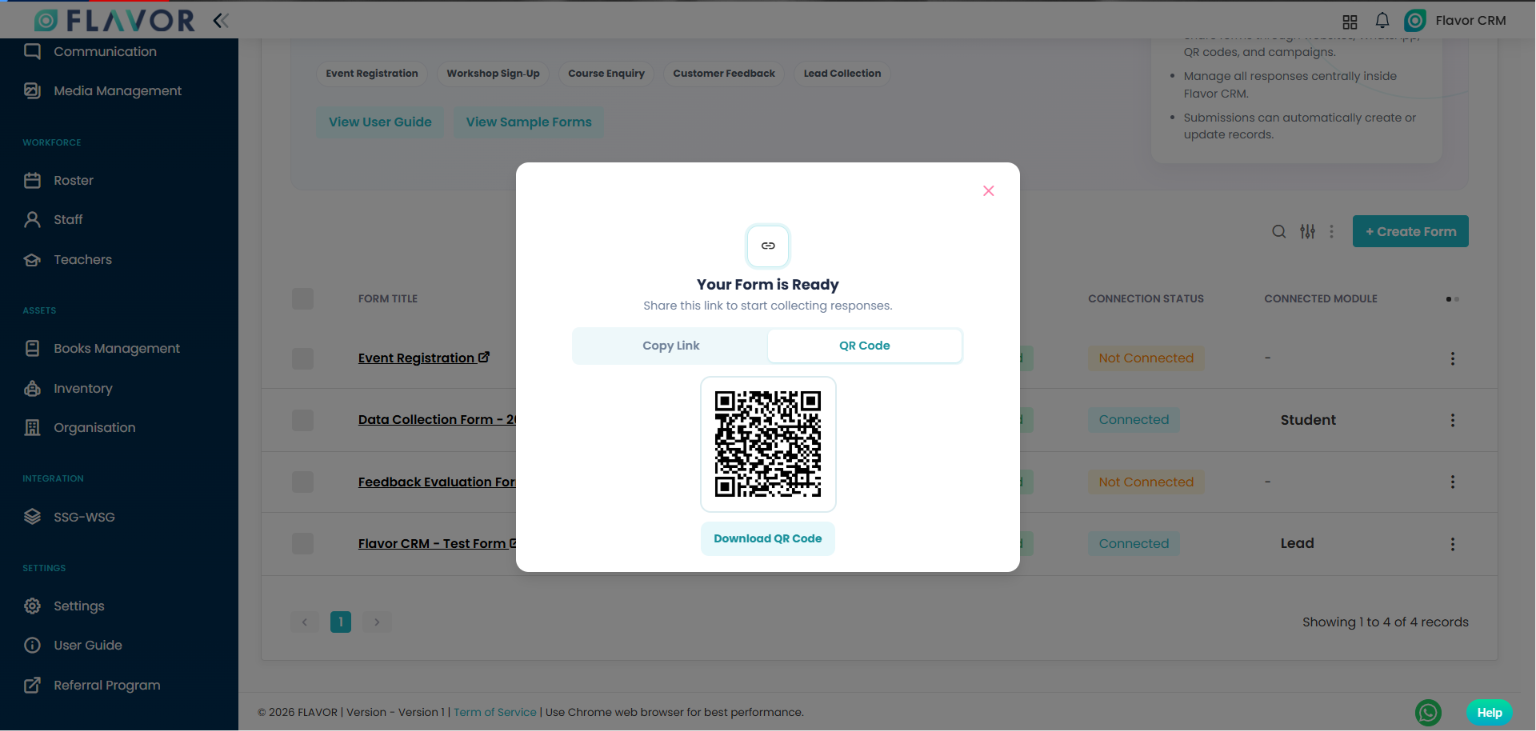
- Use QR Code tab to download QR image
Note:
- Link generation is blocked for Draft or Archived forms
Connect Form to Lead
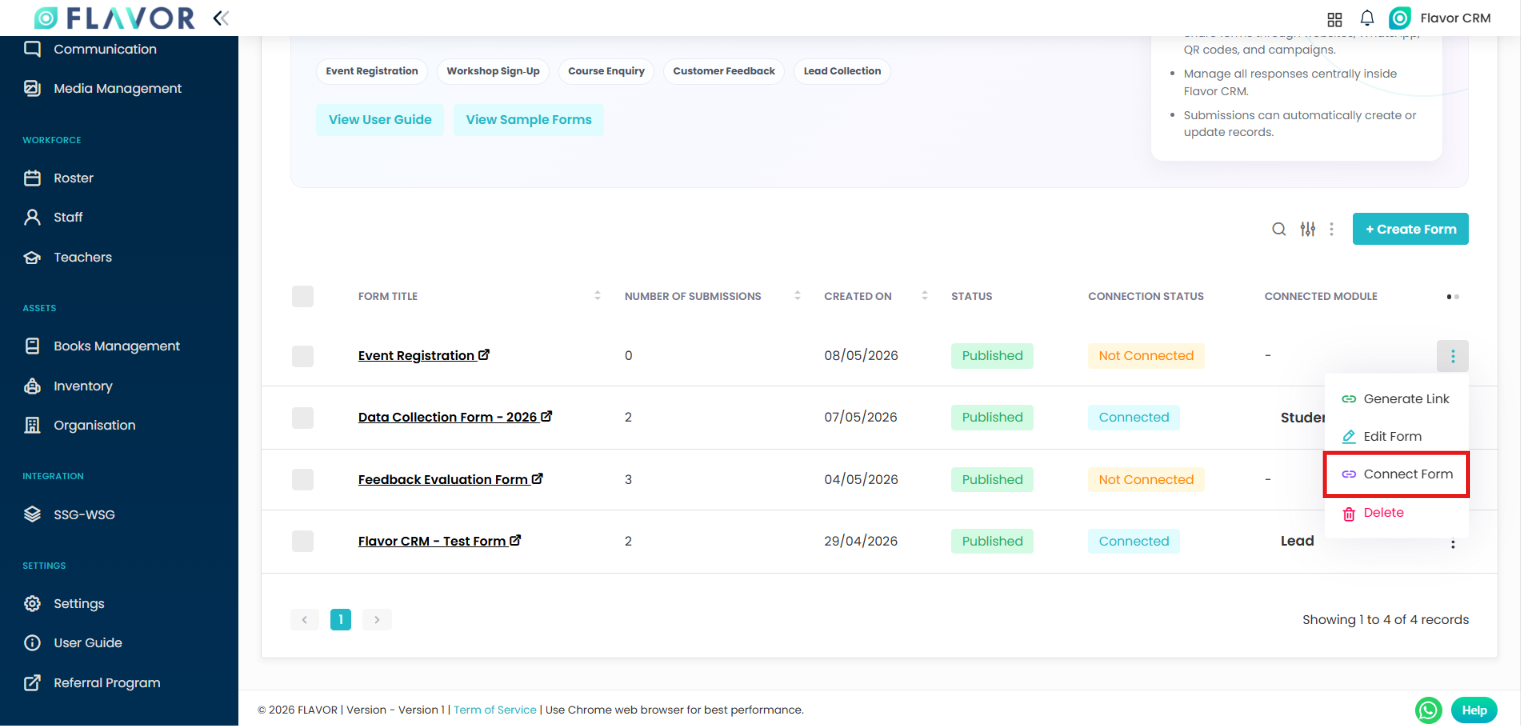
Step 1: Open Connect
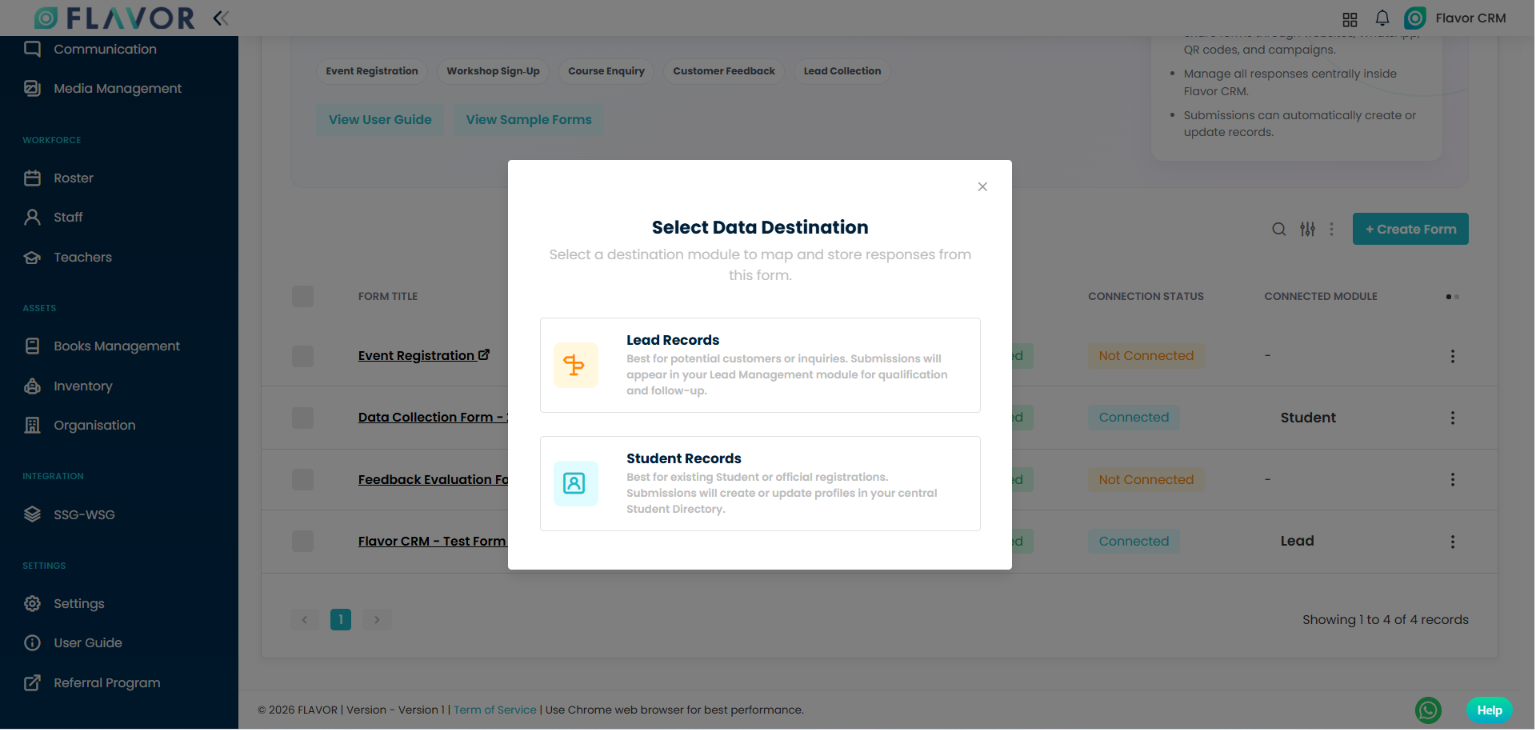
- From list actions, click Connect Form
- Select Lead Records
Step 2: Set Availability
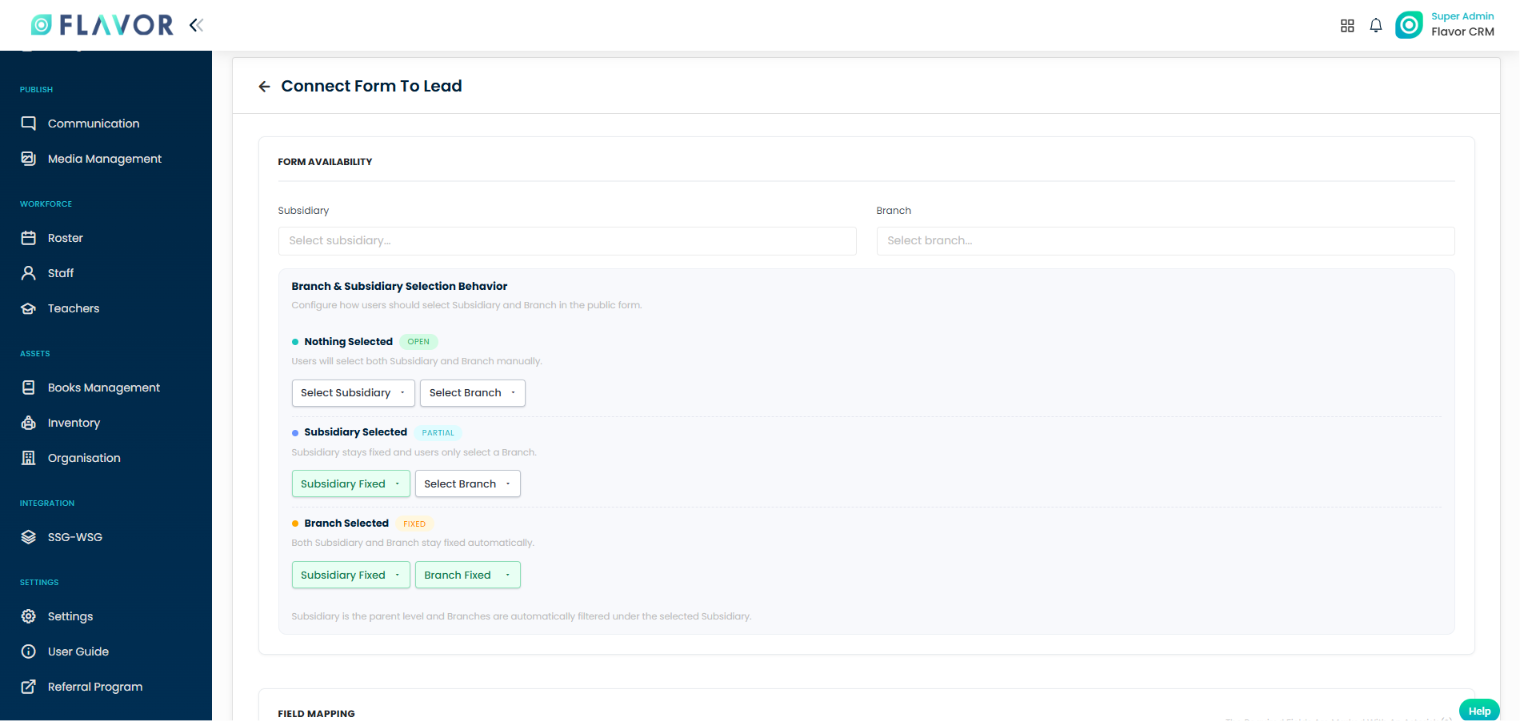
- Choose Subsidiary and Branch scope
Step 3: Map Fields
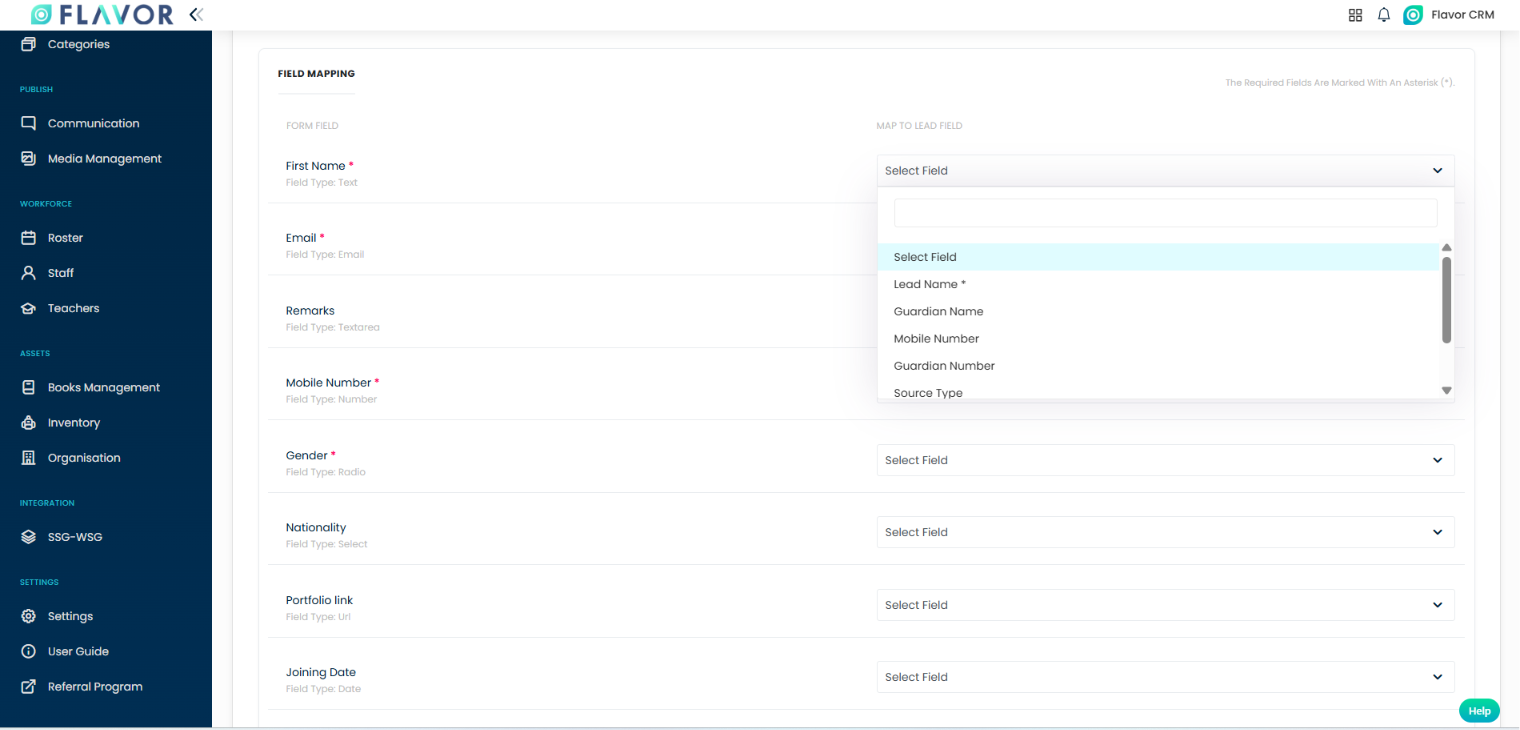
- Map each form field to a lead field
- Only compatible field types are shown
Step 4: Save Mapping
- Click Save Mapping
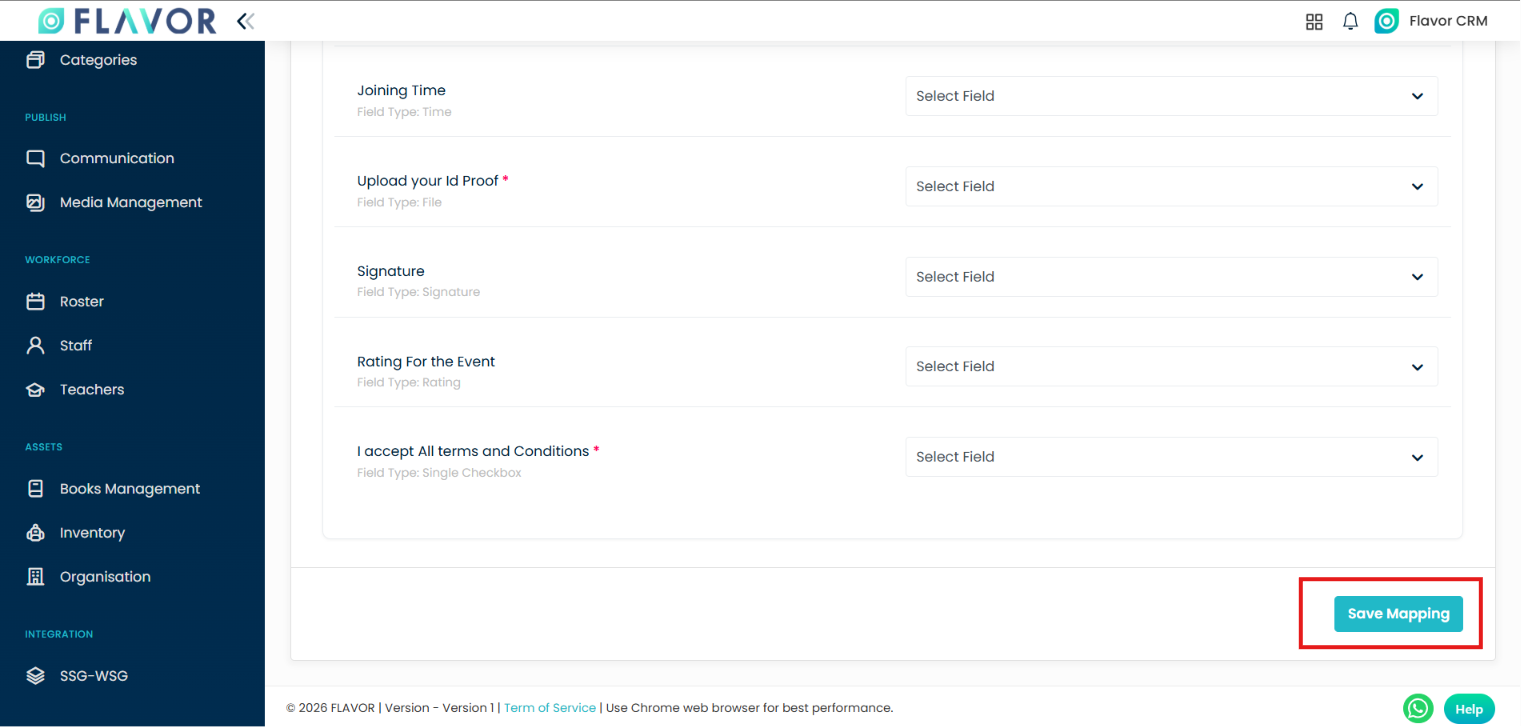
Rules:
- Duplicate mapping is not allowed
- Required fields must be mapped
Connect Form to Student
Step 1: Open Connect
- Click Connect Form and select Student Records
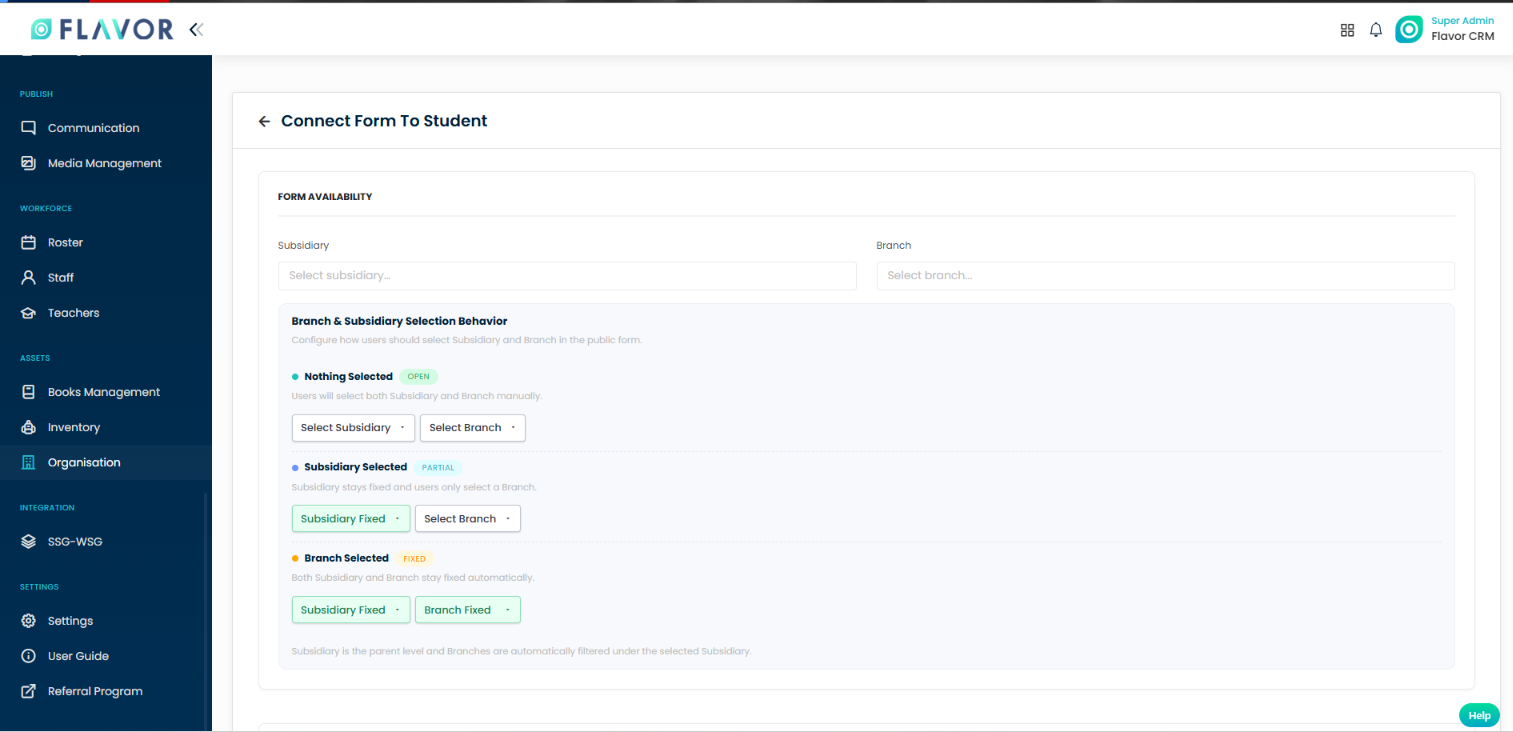
Step 2: Configure Availability
- Select subsidiaries/branches
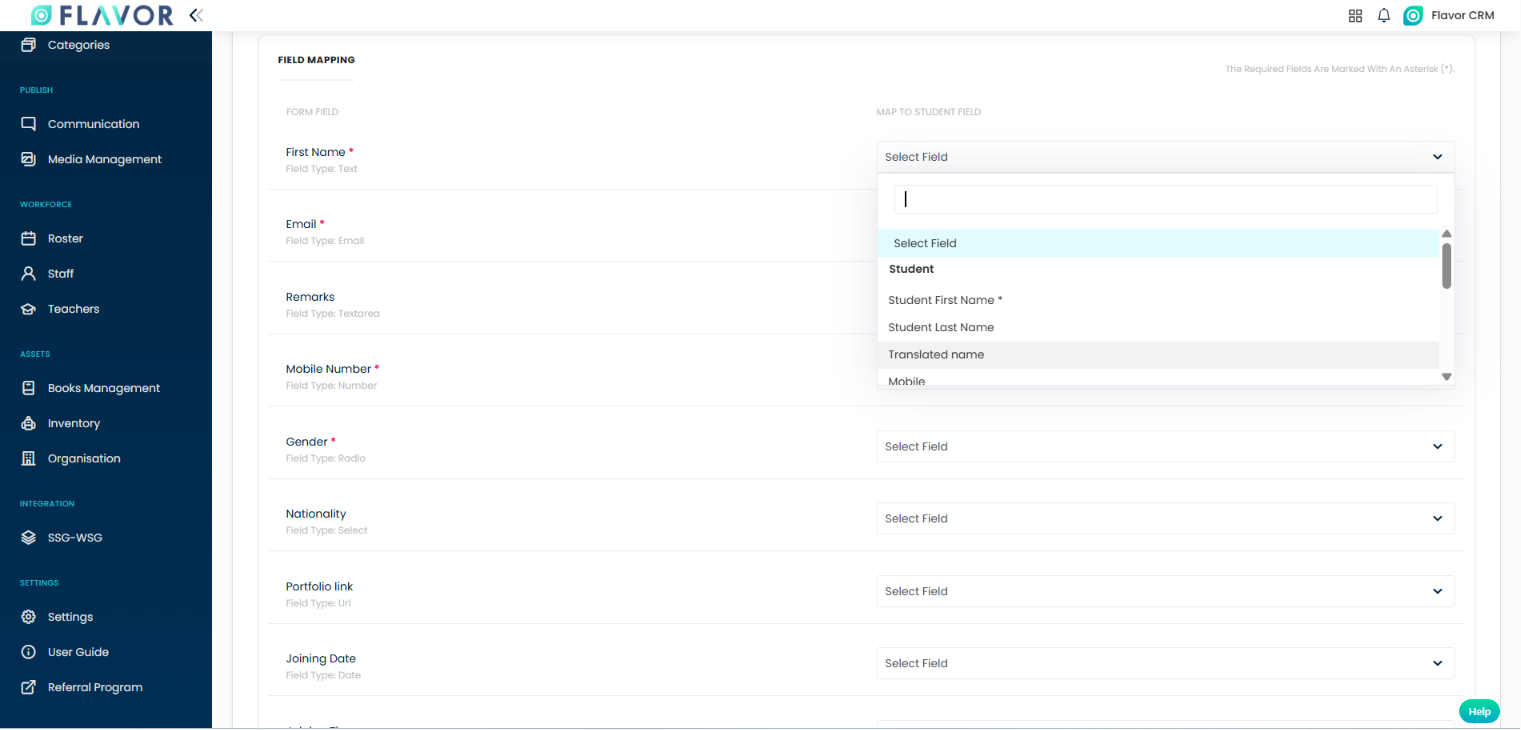
Step 3: Map Fields
- Map form fields to student fields
Step 4: Save
- Click Save Mapping
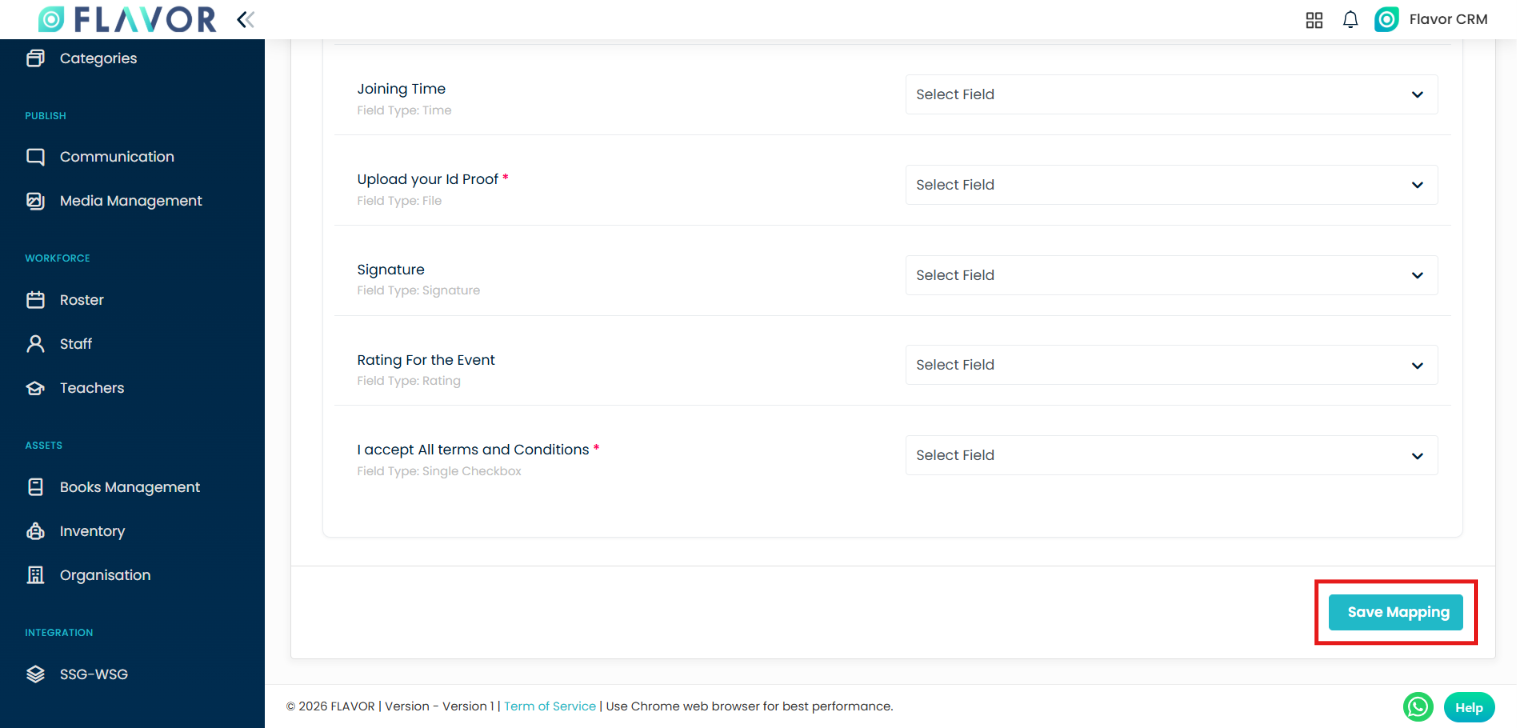
Rules:
- Duplicate mapping is not allowed
- Required fields must be mapped
View Responses
Step 1: Open Responses
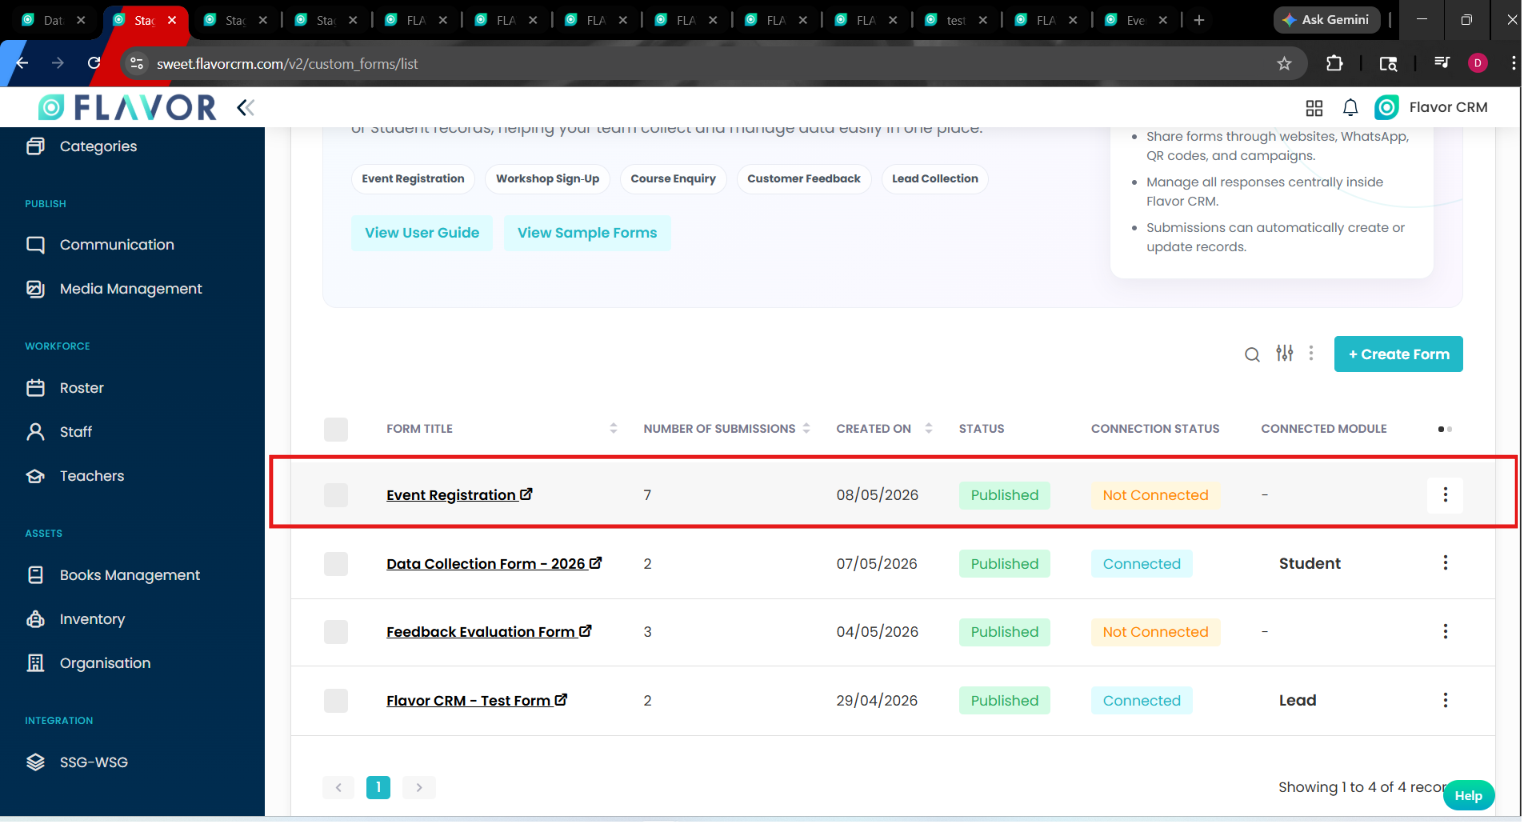
- To view form responses, click anywhere on the respective form row to access its submitted responses.
Step 2: Use Response List
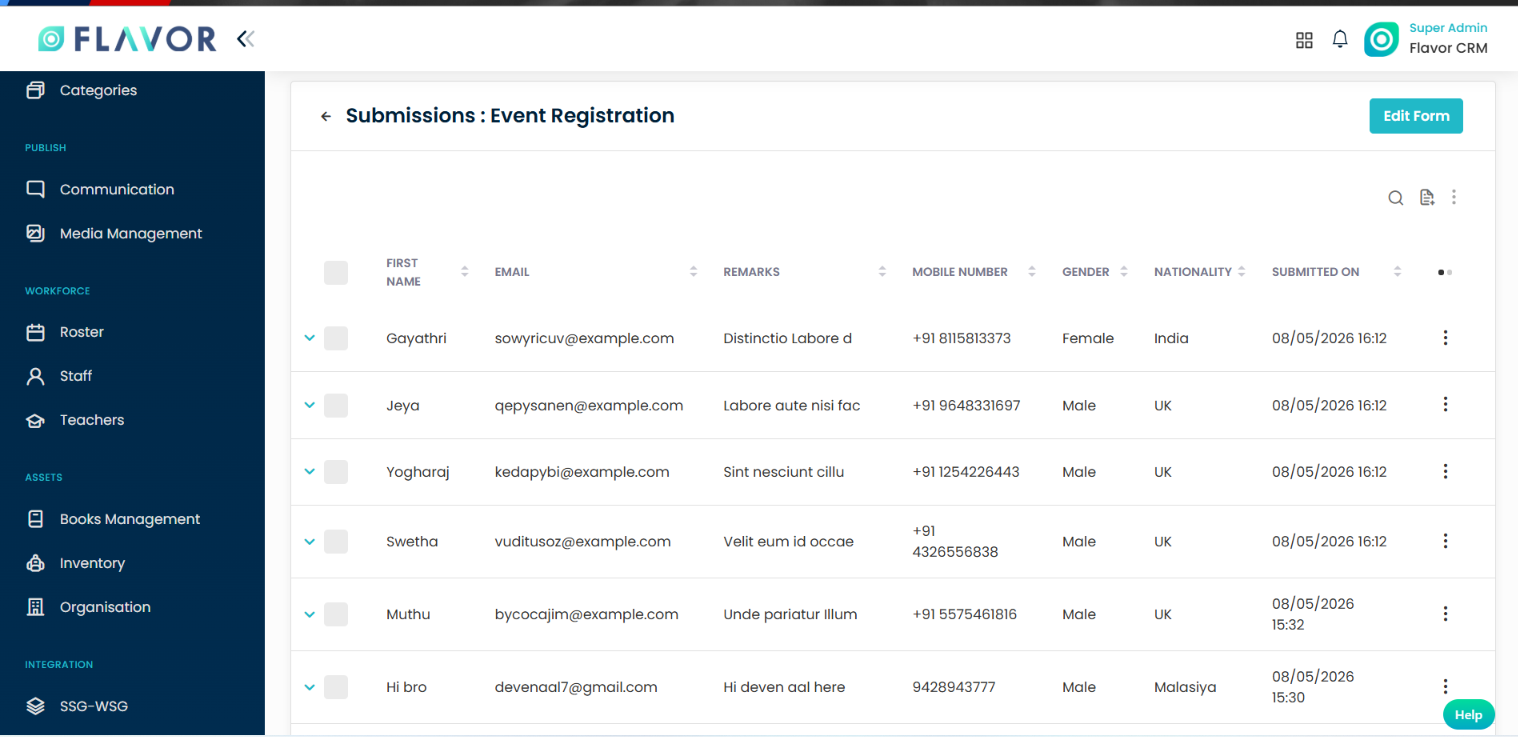
- Search responses
- View submitted values
- Check submission date and time
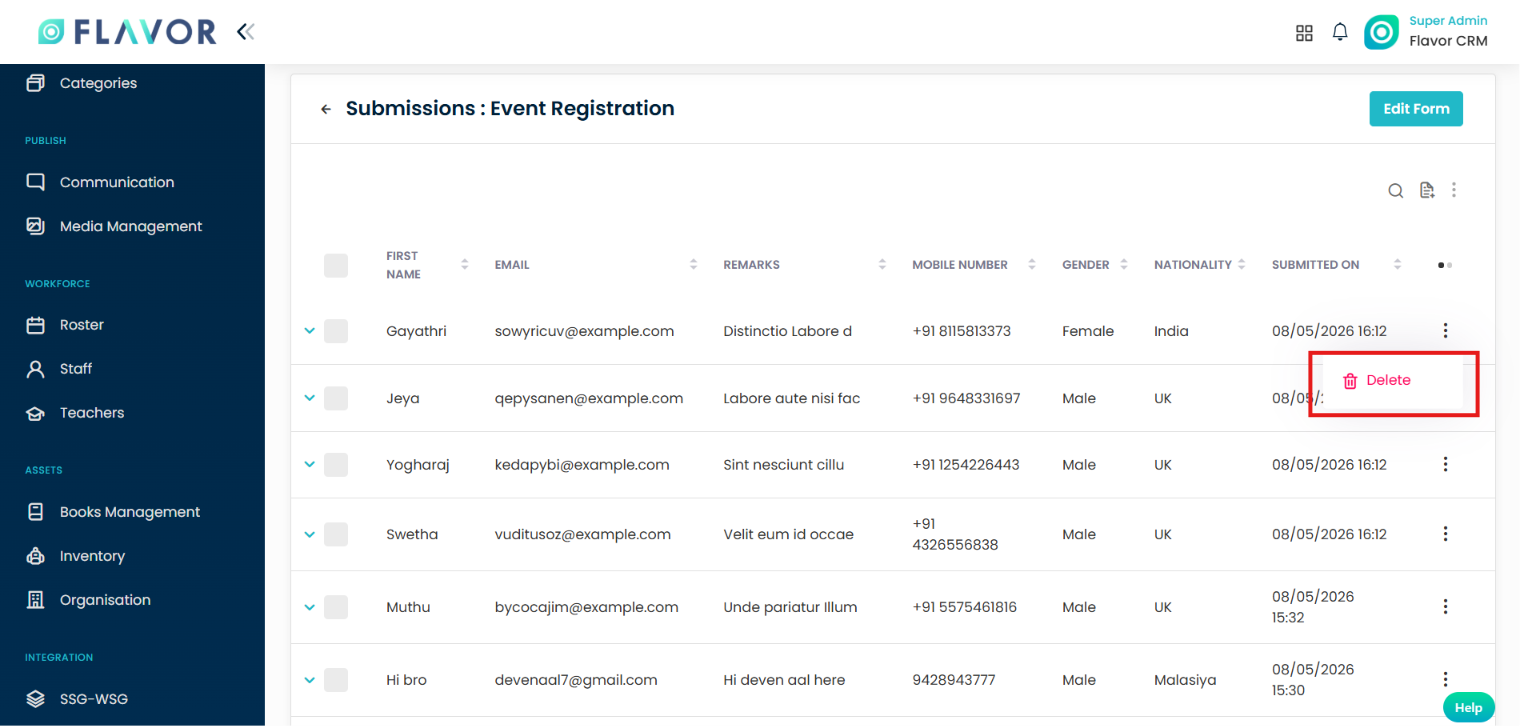
- Use actions for detail or delete
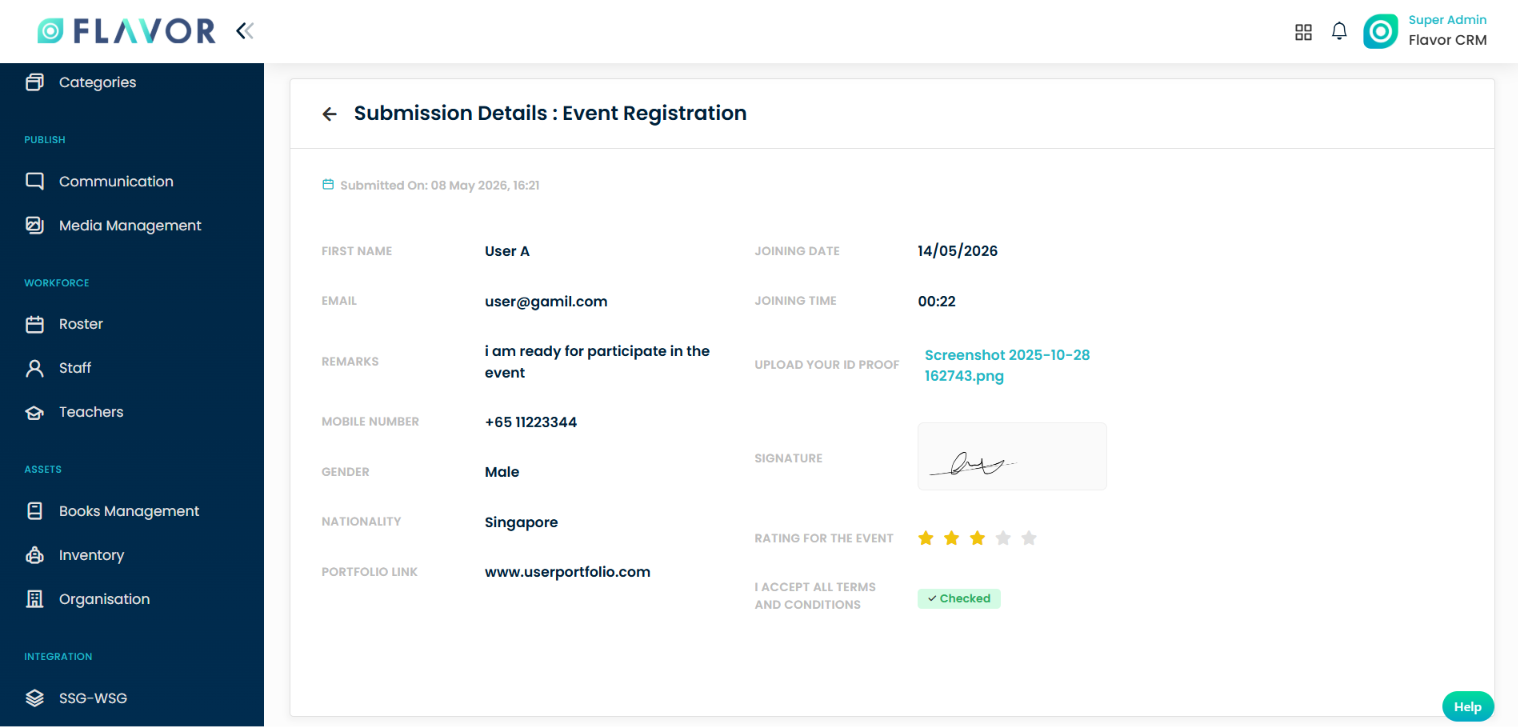
View Response Details
- Open a response from the list
- To view the response details, click on the respective response row from the response list.
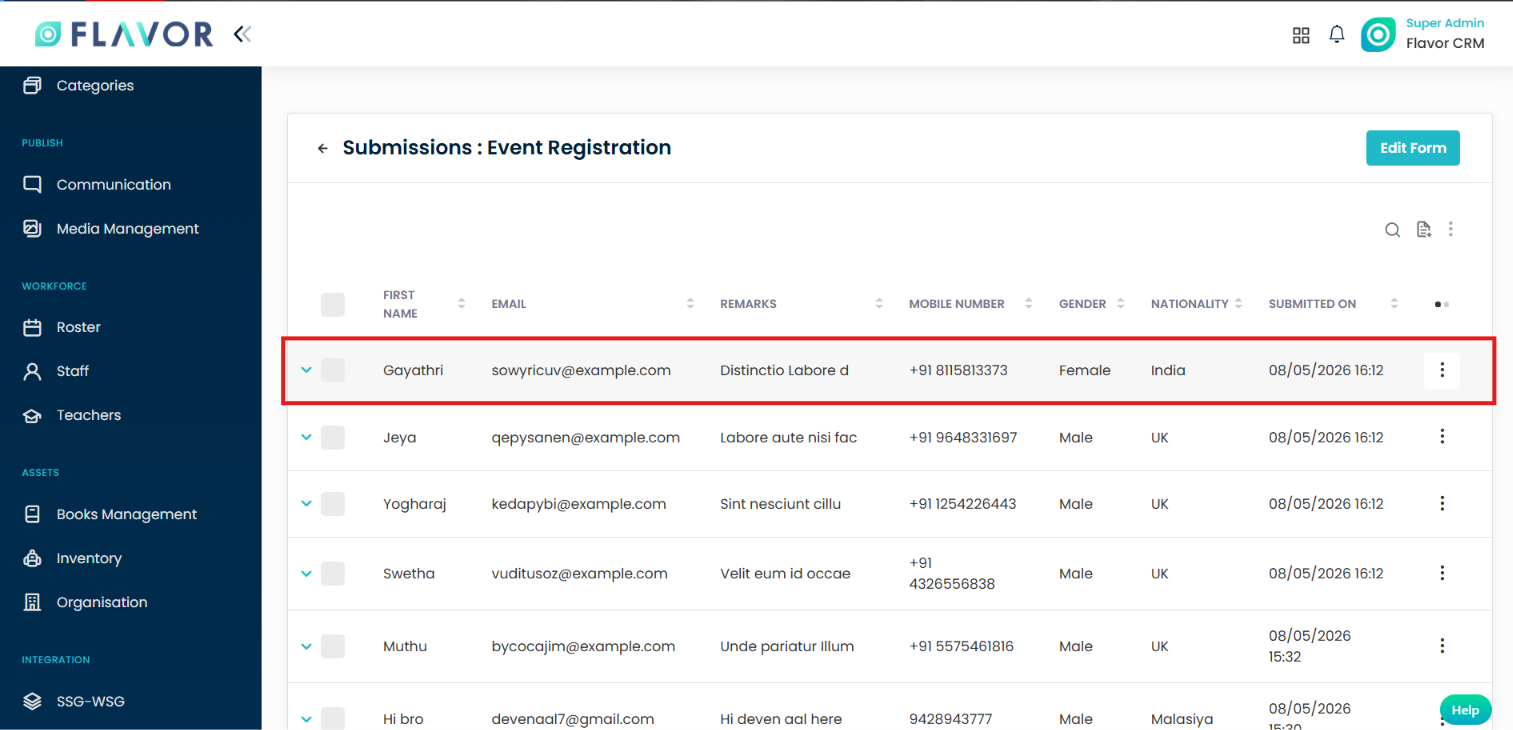
- View full submission field-by-field
- File and signature fields are shown in detail view
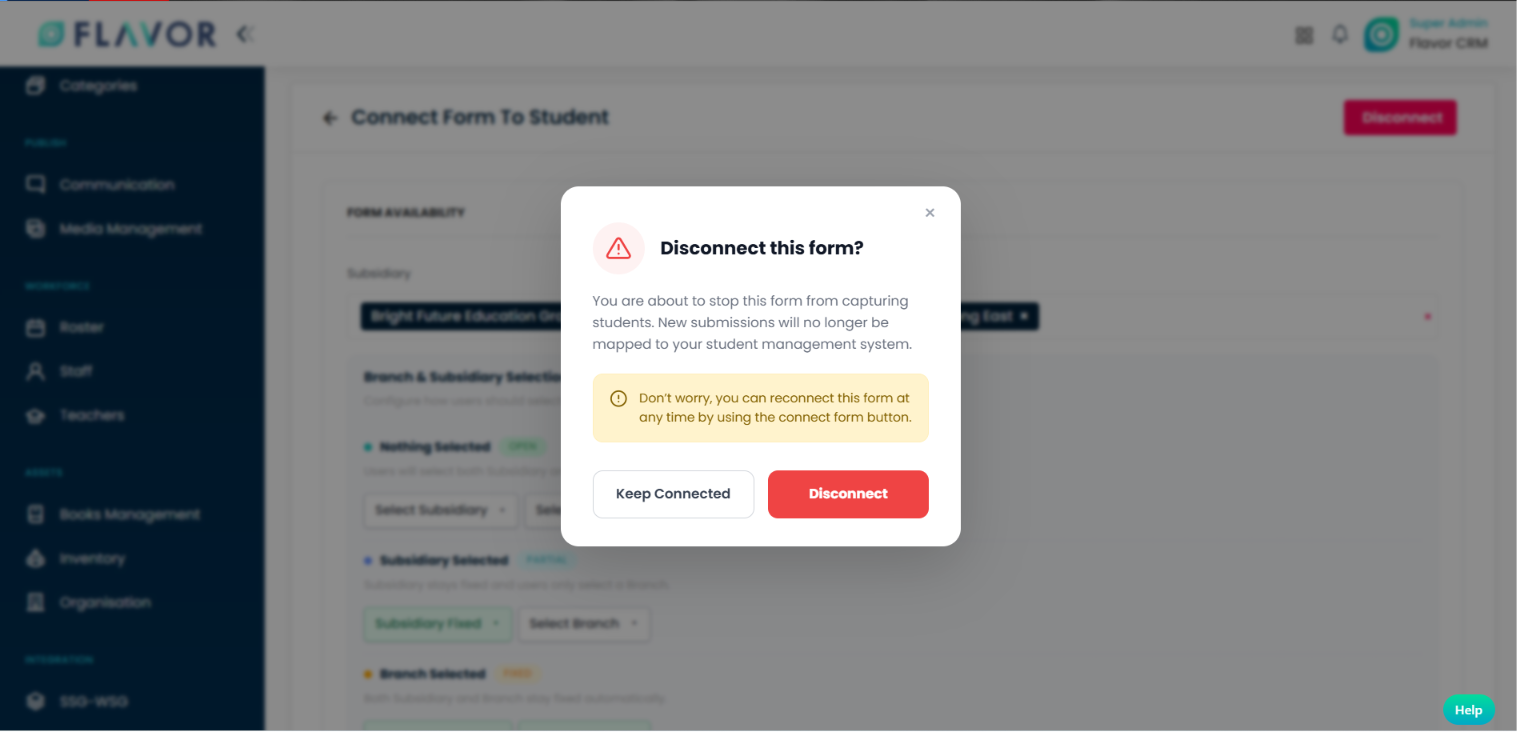
Disconnect a Form
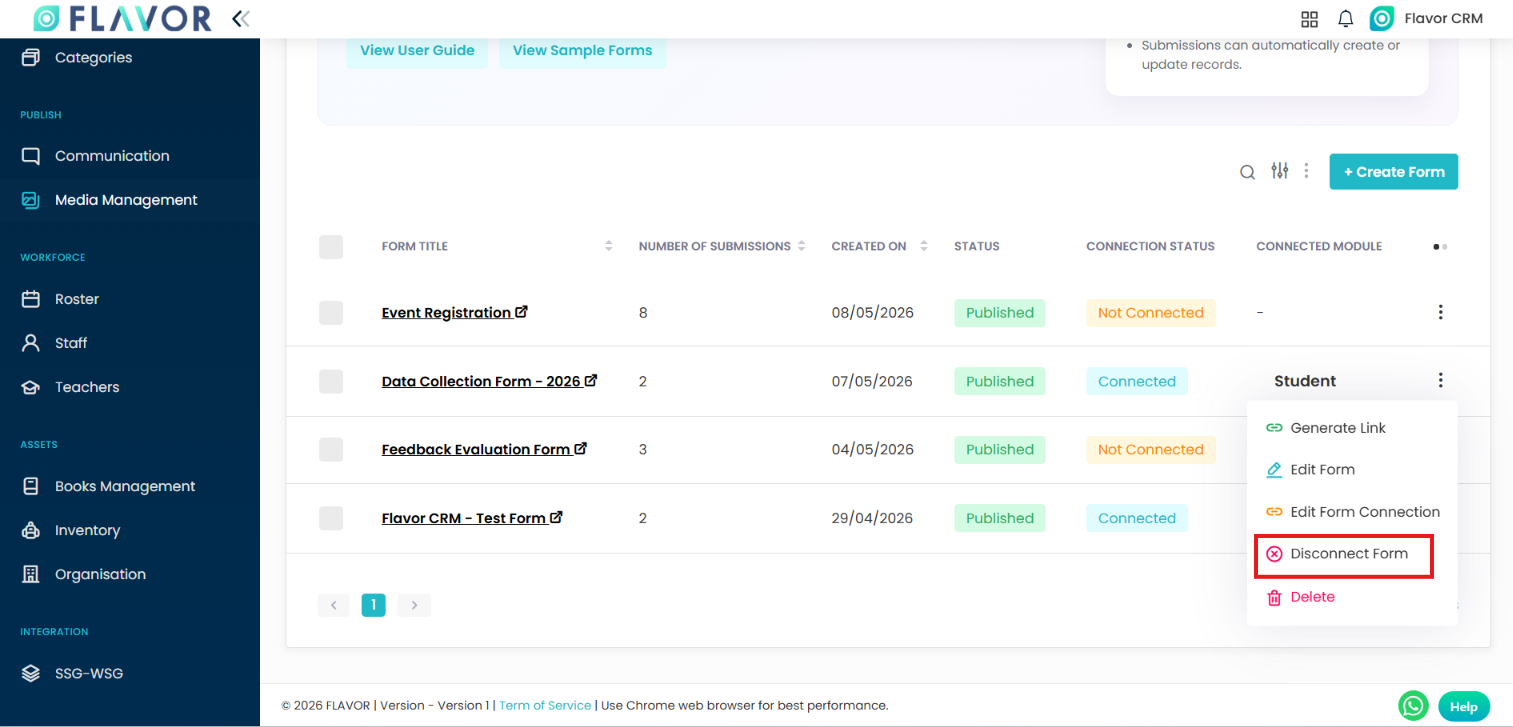
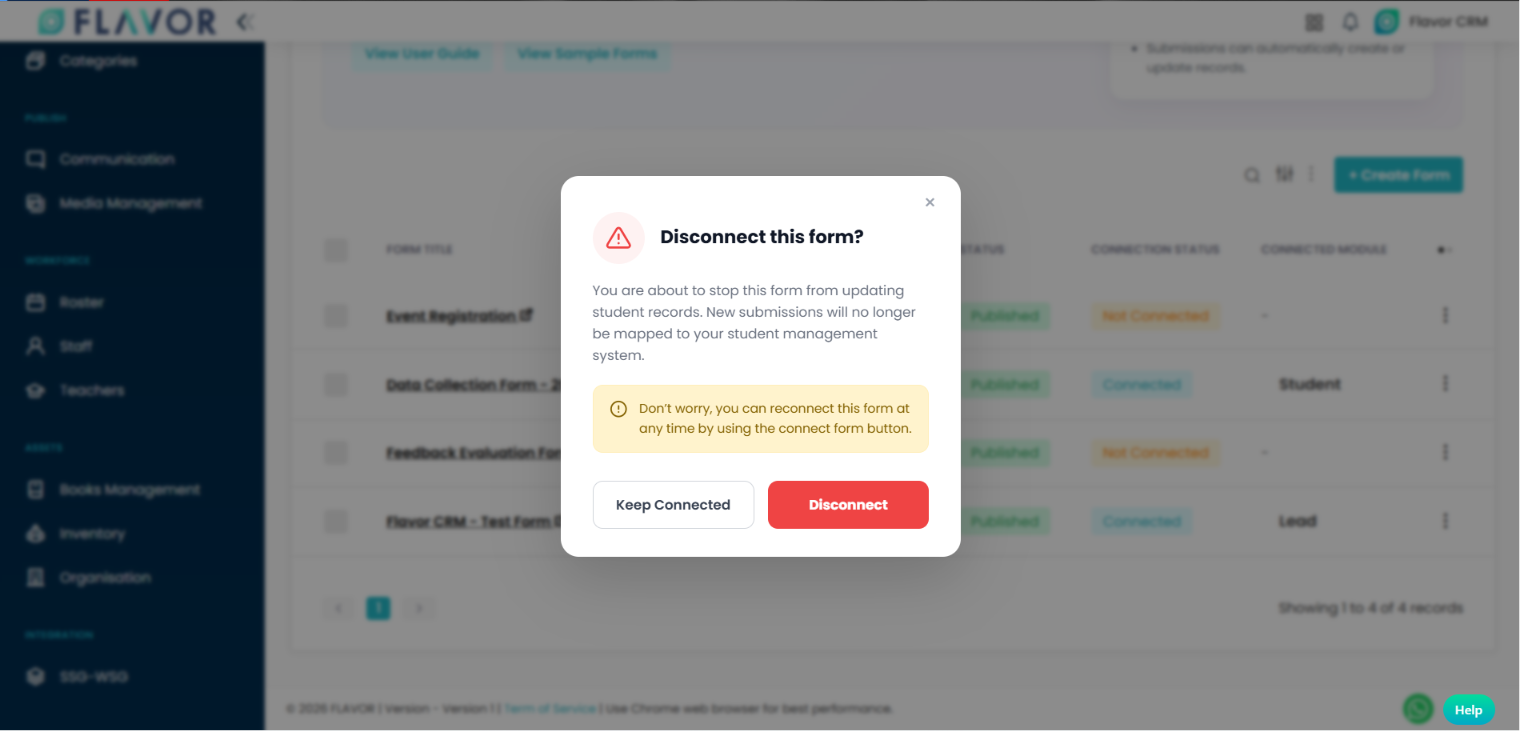
From List:
- Click Disconnect from form actions
- Confirm disconnect
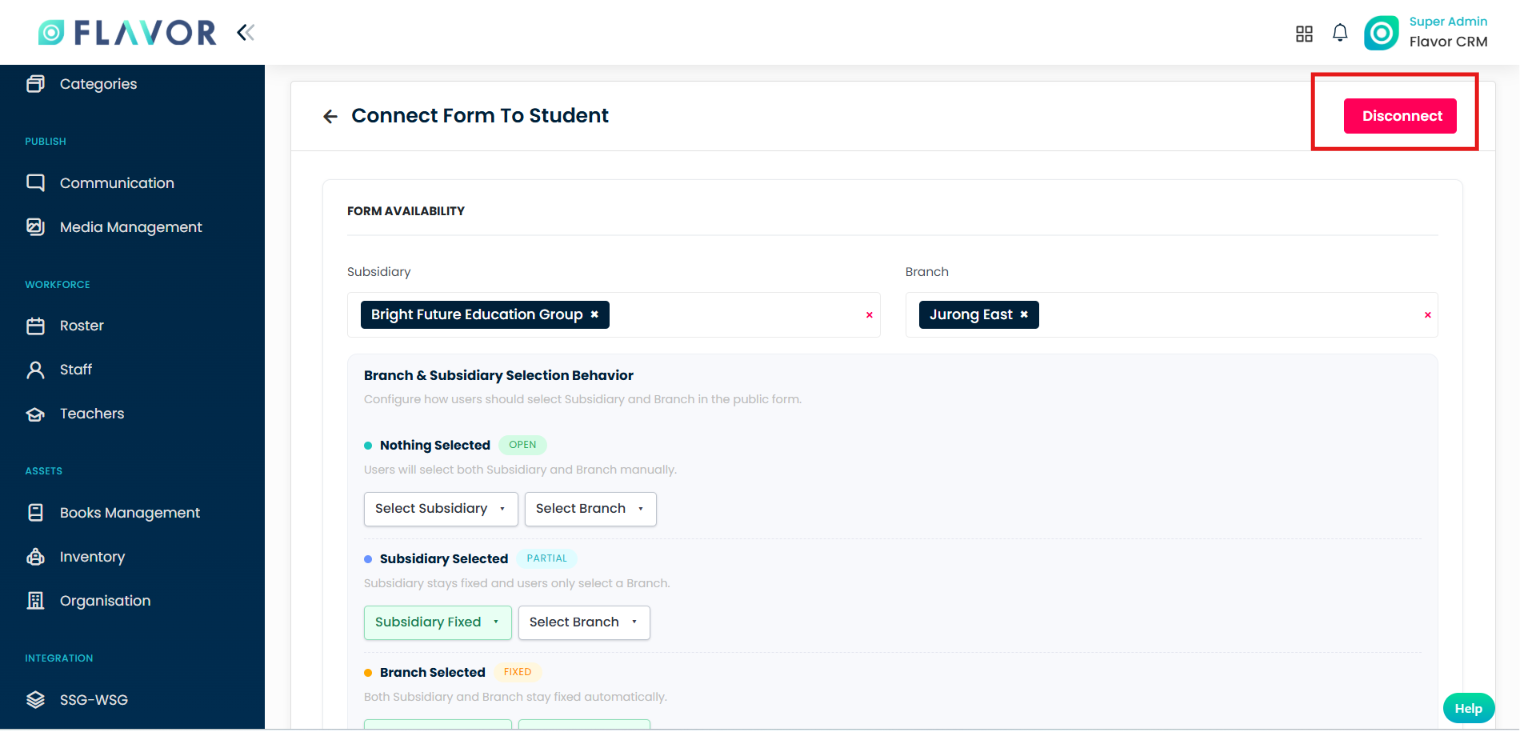
From Connection Screen:
- Open connection page
- Click Disconnect
- Confirm action
FAQs
FAQs
- Why can’t I save mapping?
Duplicate or required fields missing - Why can’t I generate link?
Only Published forms allow this - Can I restrict by branch?
Yes, using availability settings - Can users upload files?
Yes, file upload is supported
Need more help? Ask us a question
Please let us know more of your details and our team will reach out to you very shortly.
